Creating User Specific, Editable BizForms
In this article I’ll show you how to create a special type of BizForm that will allow each user to edit their specific form data over and over. When a user returns to a page that has the BizForm on it, their data will be automatically loaded from the BizForm table. This is a simple and easy way to store per user data, without mucking with the System Tables which aren’t intended to store this type of data. You also retain the benefits that a BizForm has over a System Table (A view of the data, Notifications, attachments, etc.). Here we go…
You can download the files that are used in this article here: Bizform_continue Web Part Files.
First, we’ll clone the existing BizForm Web Part.
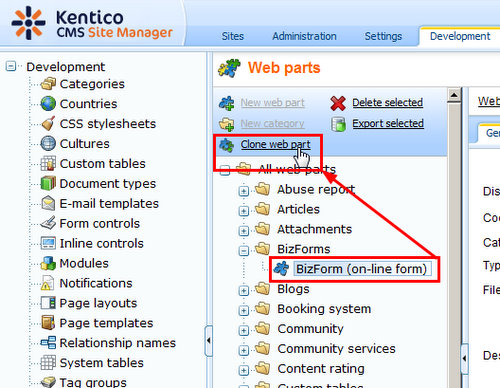
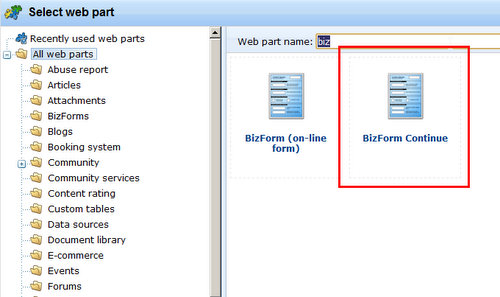
We don’t need to change anything with the configuration, but we’ll use our own set of files for the Web Part. I will show the code later below, and you can download the zip here: Bizform_continue Web Part Files.
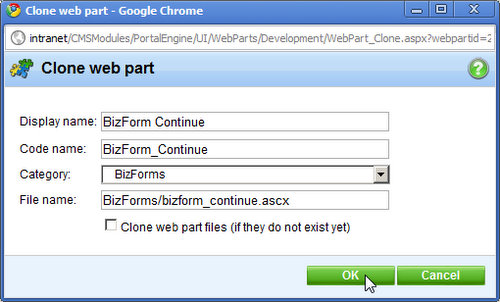
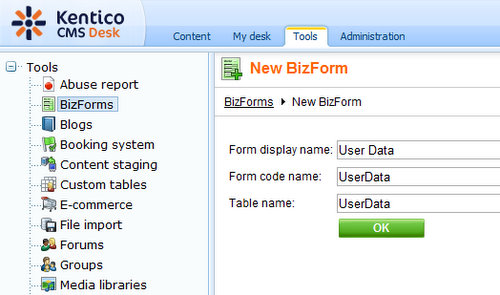
Now that we have our new Web Part setup, let’s go make a new BizForm.
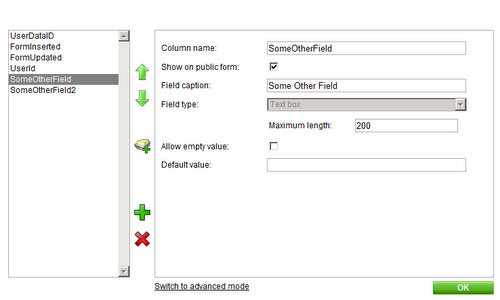
Create a field in that BizForm that will hold the User ID. Set the Default Value property to be this macro so that the User ID is filled automatically:
{<span></span>%cmscontext.currentuser.userid%<span></span>}
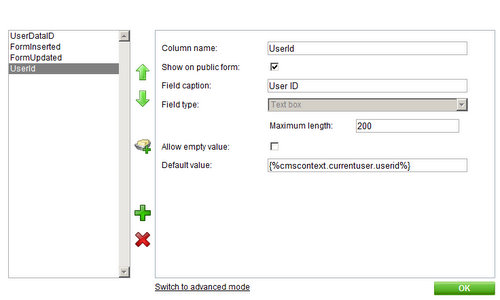
Make sure you don’t show the field on the public form! We want to rely on the macro to tell us who is editing a row. My crappy screenshot above has it selected, but just de-select it and re-save if you already saved the field.

Now make some other data fields, whatever you want!
Now that our BizForm is all set, let’s add it to a page template. I am adding mine to the main content area of the home page, just for testing. Make sure you select our new Web Part, and not the original.
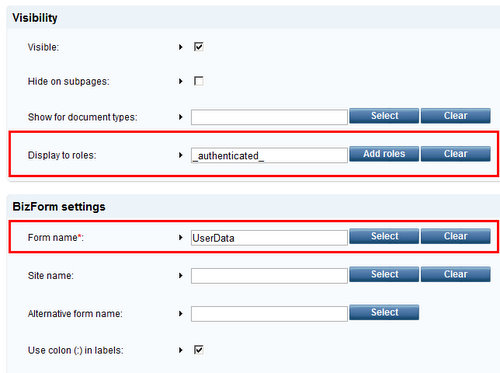
For the properties, all we really need is the Form Name, but I also set “Display to Roles” to be only authenticated users, since the rows will be tied to a specific user.
Now let’s take a look at the code. The only real change is that we added a method that happens before load of the data for the form. We simply call a method that contains the following code:
var bizFormInfo = BizFormInfoProvider.GetBizFormInfo(viewBiz.FormName, viewBiz.SiteName);

if (bizFormInfo != null)
{
	var dataClassInfo = DataClassInfoProvider.GetDataClass(bizFormInfo.FormClassID);

	if (dataClassInfo != null)
	{
		var connection = ConnectionHelper.GetConnection();
		var whereCondition = String.Format("UserId = '{0}'", CMSContext.CurrentUser.UserID);
		var dataSet = connection.ExecuteQuery(dataClassInfo.ClassName + ".selectall", null, whereCondition);

		if (!DataHelper.DataSourceIsEmpty(dataSet) && dataSet.Tables[0].Rows.Count == 1)
		{
			var formRecordId = ValidationHelper.GetInteger(dataSet.Tables[0].Rows[0][0], 0);

			viewBiz.FormMode = FormModeEnum.Update;
			viewBiz.ItemID = formRecordId;

			return;
		}

		viewBiz.FormMode = FormModeEnum.Insert;
	}
}
We get the BizFormInfo, the DataClassInfo, and check to see if there is an existing record. If there is an existing record we set the BizForm to Update mode and tell it what row to load . If there is no record found, we simply use insert mode.
Hope that this was clear and helps somebody make their site even more awesome!
You can download the files that are used in this article here: Bizform_continue Web Part Files.